
Subscription accounts are designed to support an ‘unlimited’ wash application. These accounts are product-based accounts that are valid for a specific wash package and can be redeemed by a code, magnetic stripe card or windshield mounted (RFID) tag. It should be noted, that customers using a subscription account are able to add money to upgrade to a better wash if Upgrades are enabled. Sierra does not include a recurring billing application for subscription account payment, therefore, the sale of a subscription account is not reported as revenue. Likewise, redemptions against these accounts are not reported as revenue. Redemptions are included in the Transaction Count in the summary section of the revenue report but are excluded from the Paid Transactions count. If a recurring billing applications is needed, your credit processor should be able to accommodate this feature.
Subscription accounts should be set up by first creating a subscription account program (e.g. Gold, Silver, Bronze pass) then issuing individual accounts from the desired program. Subscription accounts can also be configured to operate on a schedule and have expiration dates and frequency limits.
The process for setting up and selling subscription accounts is:
To setup a new subscription account program, go to the Accounts tab, then select Programs from the left frame.
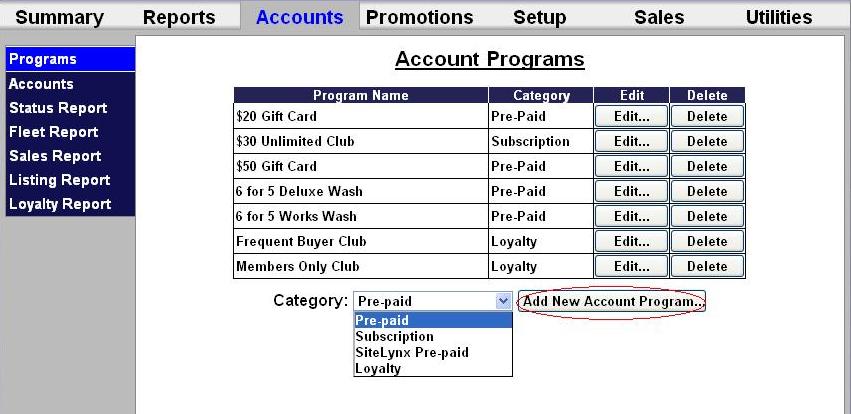
Select Subscription from the drop-down menu below the table and click Add New Account Program. The Edit Account screen will be displayed.
To setup a rewards program, follow the directions, below. For a discount program, scroll further down this tutorial.
Select Subscription from the drop-down menu below the table and click Add New Account . The Edit Account screen will be displayed. 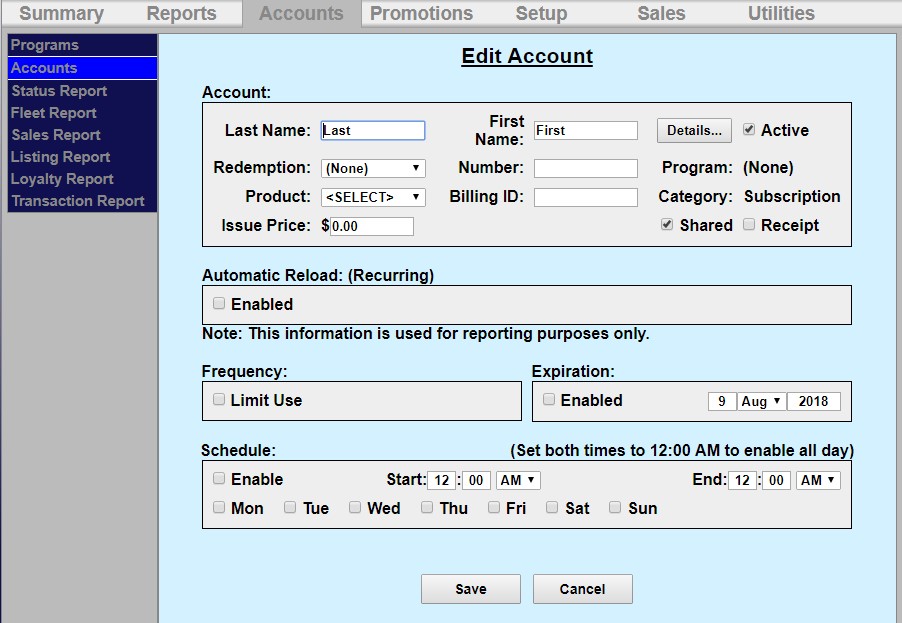
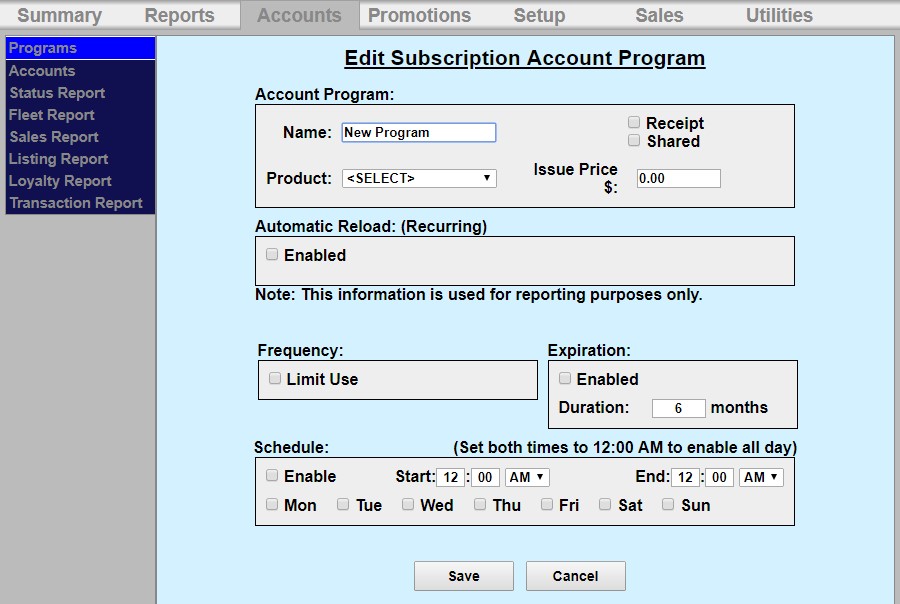
You may limit the use and only allow a certain amount of washes per day, week, month or year. To do this, click Limit Use and enter the amount of washes and the time increment from the drop-down menu.
If you wish for the account to have an expiration date, click Enable, then enter the duration of the account program. NOTE: This schedule runs in calendar months. The account will expire on the last day of the month, not 30 days from the issue date.
If you wish to limit usage of the account to certain days and hours, click Enable under the schedule block and enter the valid times and days of the week.
Click Save.
To setup the sales buttons, go to the Setup tab and click Sales on the left frame.
.jpg)
Click on a Not Used button to configure it.
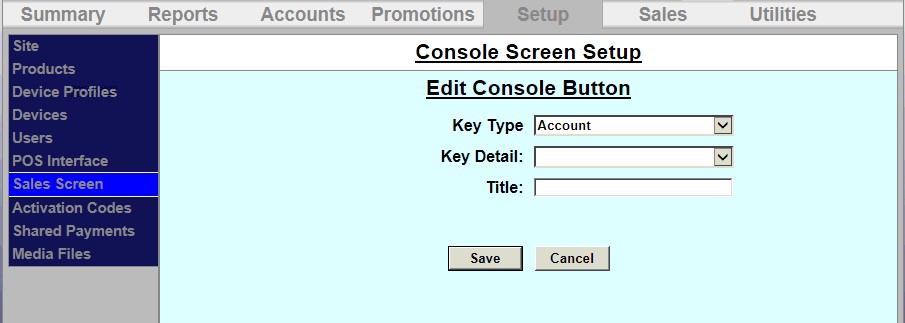
Select Account from the drop-down menu.
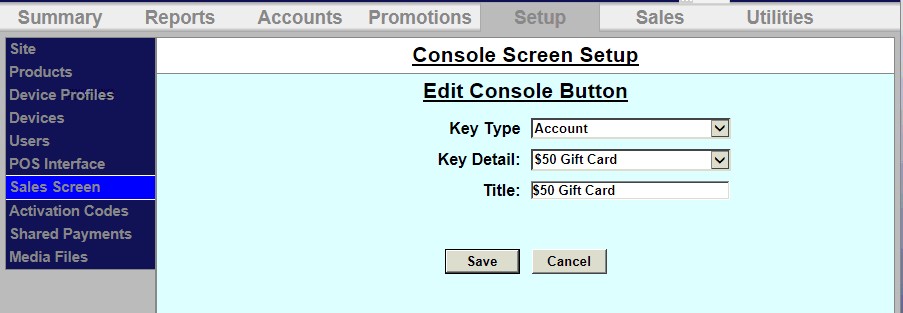
Select the account from the drop-down menu. In this example, we are setting up the $50 Gift Card sales button.
The title field will automatically populate. Click Save. Repeat these steps for each sales button you’d like to setup.
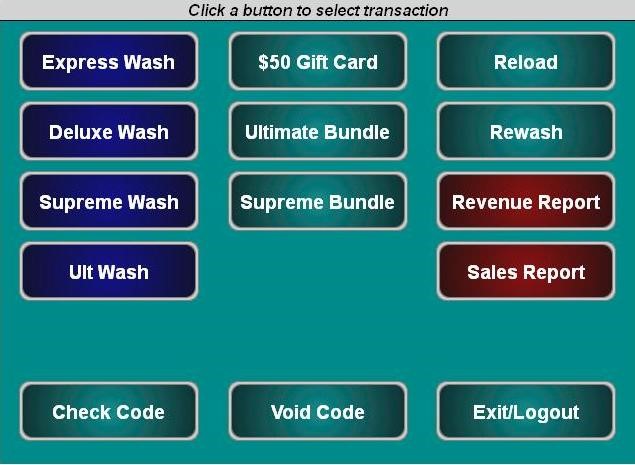
Now go to the Sales tab at the top of the screen. Each sales button will be displayed.
To issue a new account, go to the Sales tab at the top of the screen. Follow the instructions in gray at the top of the sales screen.
To purchase a new account, click on the account.
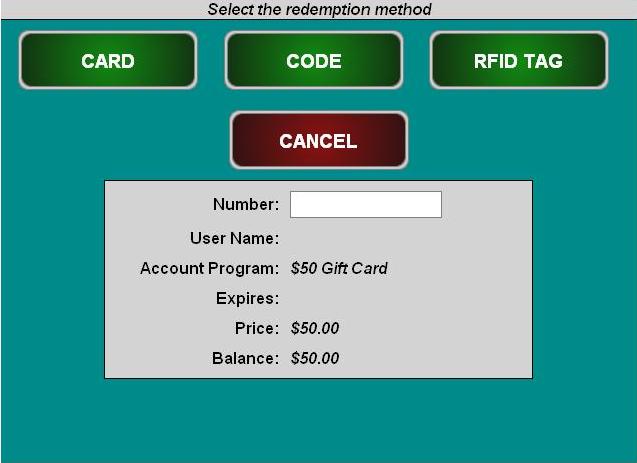
Select code or card.
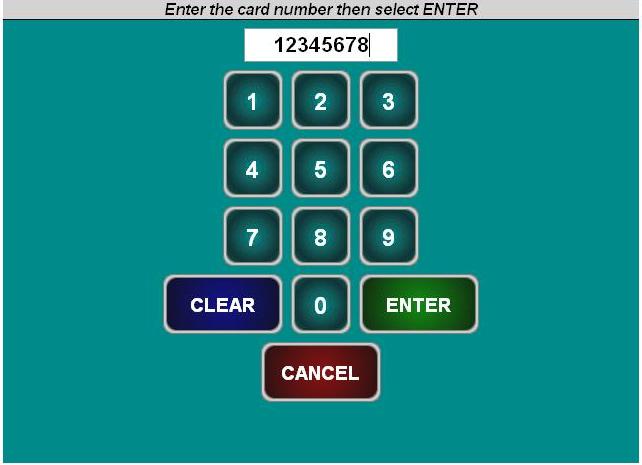
Enter the code or card number.
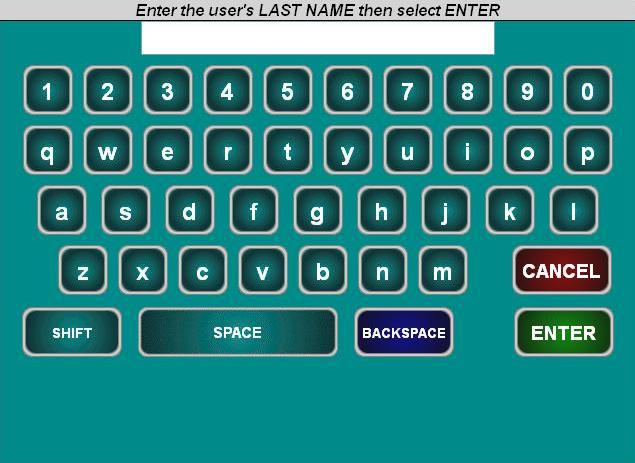
Enter the account holder’s last and first name.
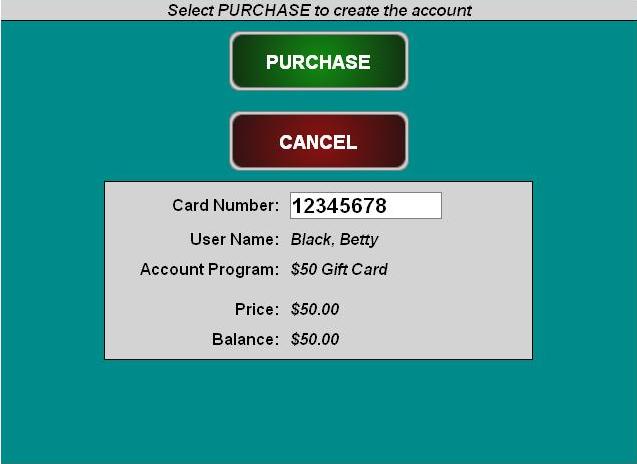
Click Purchase to finalize the account purchase.
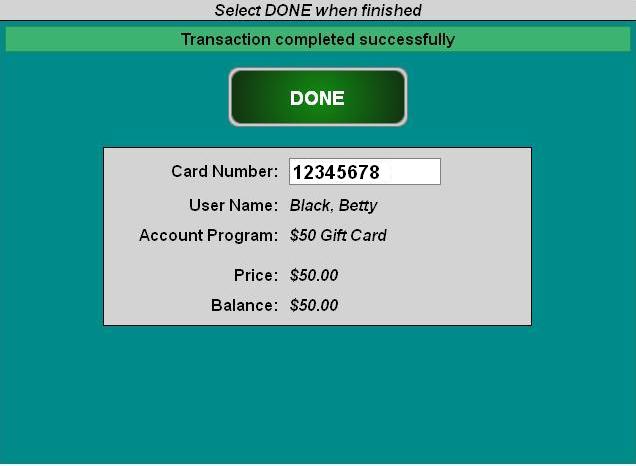
Click Done.