How to Setup a Pre-Paid Account
Prepaid accounts can be set up as product or monetary account types. A product account allows multiple uses of a specific wash (5 Works washes, for example). A monetary account is a gift card. Prepaid accounts can be set up for redemption through a manually entered code or a magnetic stripe card. It’s recommended that accounts be issued (or sold) through the Sales or Console page but they can also be issued through the account management pages.
You may reload the account without reentering all information, and the customer may also reload his account at the entry unit. If the balance of the account is insufficient for the purchase, the customer will be asked if they’d like to recharge the account. If they choose to do so, they’ll be prompted to add payment and the account will be recharged for the amount that’s defined in the account program.
The process for setting up and selling prepaid accounts is:
- Set up an account program through the Accounts/Programs function of the Sierra management system.
- Set up an individual account through the Accounts/Accounts function of the Sierra management system.
- Set up a sales button on the Sales/Console page for issuing new accounts.
- Purchase a new account for the customer from the Sales/Console screen.
Set up an account program
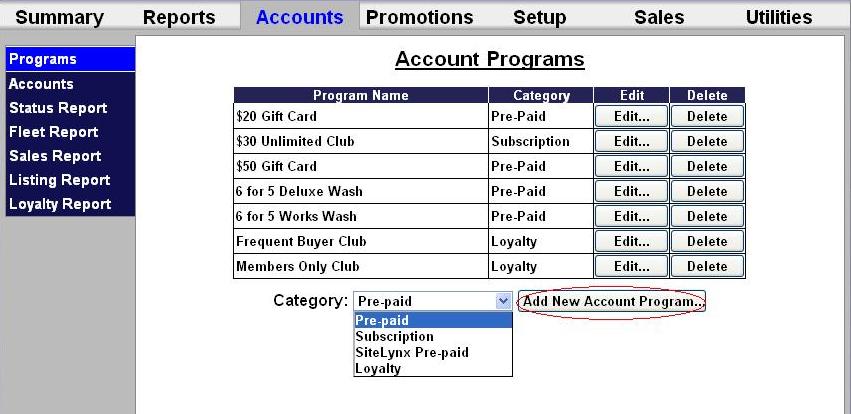
To setup a new pre-paid account program, go to the Accounts tab, then select Programs from the left frame.
Select Pre-paid from the drop-down menu below the table and click Add New Account Program. The Edit Account screen will be displayed.
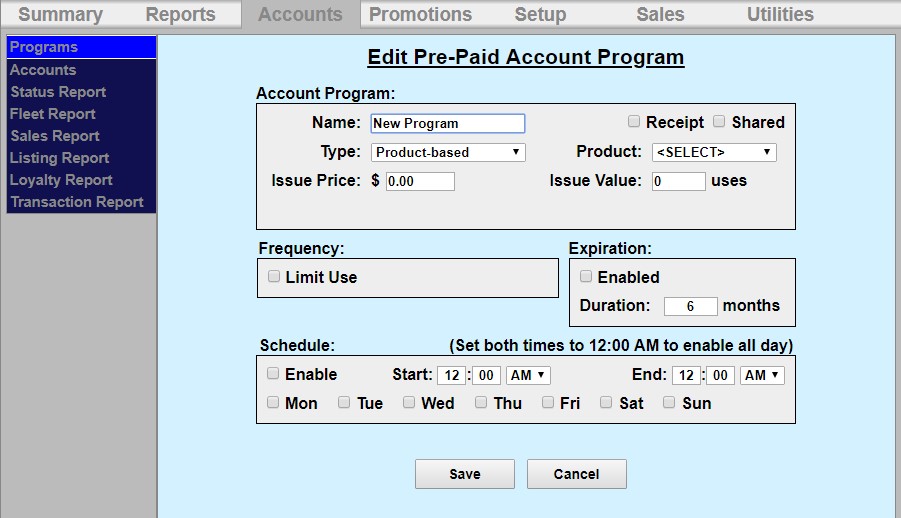
- Enter the name of the account program. Chose whether or not to force a receipt with each transaction.
- Select the type from the drop-down menu - Monetary or Product-based.
- Select the wash package from the Product drop-down menu, if the program is product-based.
- Enter the Issue Price (or selling price) that will be reported when a new account is issued (or sold) and then enter the Value for which the account can be redeemed.
- You may limit the use and only allow a certain amount of washes per day, week, month or year. To do this, click Limit Use and enter the amount of washes and the time increment from the drop-down menu.
- If you wish for the account to have an expiration date, click Enable, then enter the duration of the account program. NOTE: This schedule runs in calendar months. The account will expire on the last day of the month, not 30 days from the issue date.
- If you wish to limit usage of the account to certain days and hours, click Enable under the schedule block and enter the valid times and days of the week.
- Click Save.
Set Up and Individual Account
To setup a new pre-paid account, go to the Accounts tab, then select Accounts from the left frame.
 Select Pre-paid account from the drop-down menu below the table and click Add New Account . The Edit Account screen will be displayed.
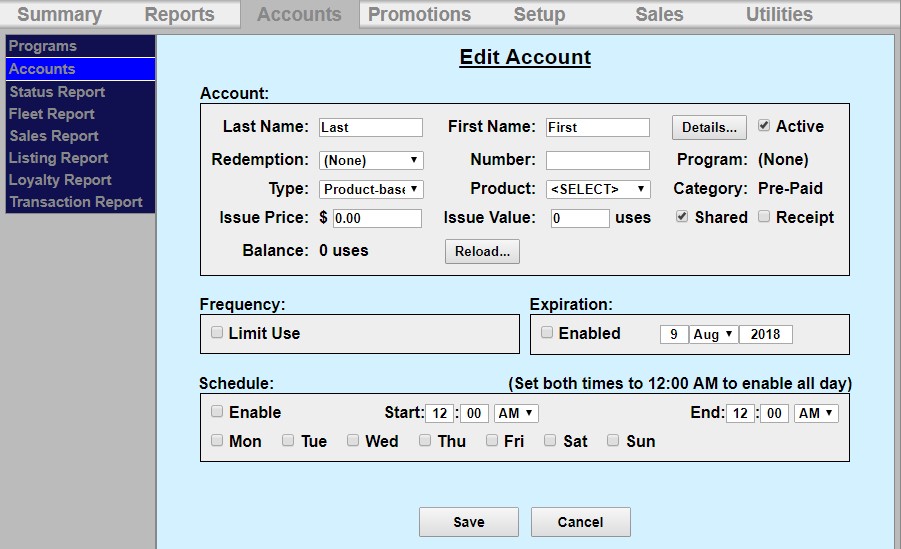
- The account set-up page will show values that were set-up for the account program but additional data will need to be entered for the account holder as follows:
- Last and First name of the Account holder. A mailing address can be entered if desired by selecting the ‘details’ tab.
- Redemption method – select code, card, barcode or RFID (Subscription accounts only) from the drop down menu.
- Number – Enter code, card number or RFID tag number.
- Select the type of pre-paid account- monetary or product-based.
- Select the Product from the drop-down menu, if it is a product-based account.
- Enter the Issue Price and issue value.
- You may limit the use and only allow a certain amount of washes per day, week, month or year. To do this, click Limit Use and enter the amount of washes and the time increment from the drop-down menu.
3. If you wish for the account to have an expiration date, click Enable, then enter the duration of the account program. NOTE: This schedule runs in calendar months. The account will expire on the last day of the month, not 30 days from the issue date.
5. If you wish to limit usage of the account to certain days and hours, click Enable under the schedule block and enter the valid times and days of the week.
6. Click Save.
Set Up a Sales Button
To setup the sales buttons, go to the Setup tab and click Sales on the left frame.
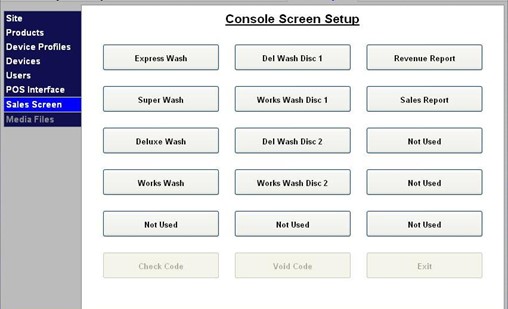
Click on a Not Used button to configure it.
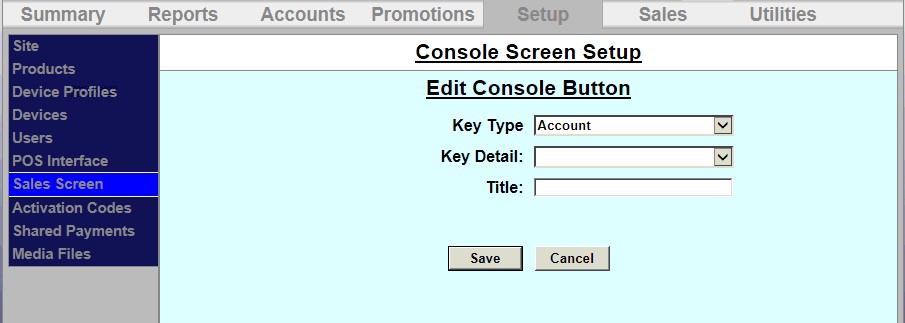
Select Account from the drop-down menu.
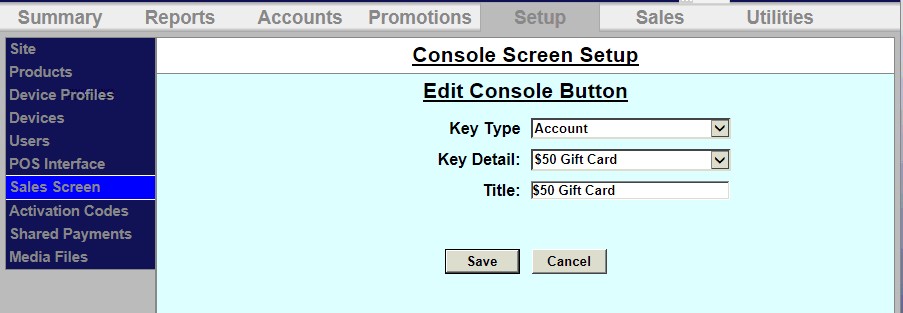
Select the account from the drop-down menu. In this example, we are setting up the $50 Gift Card sales button.
The title field will automatically populate. Click Save. Repeat these steps for each sales button you’d like to setup.
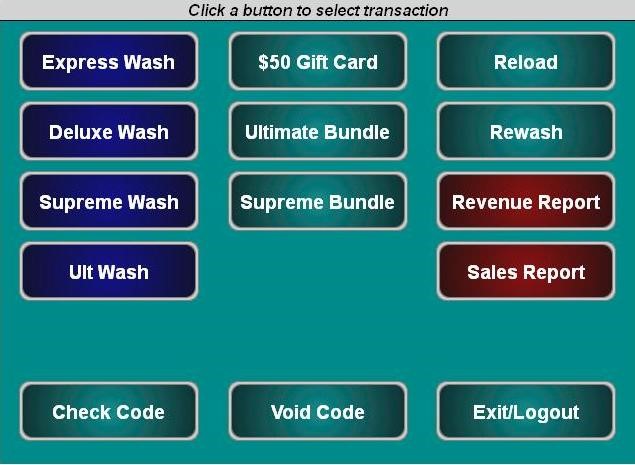
Now go to the Sales tab at the top of the screen. Each sales button will be displayed.
Purchase a New Account for the Customer
To purchase a new account, go to the Sales tab at the top of the screen. Follow the instructions in gray at the top of the sales screen. To purchase a new account, click on the account.
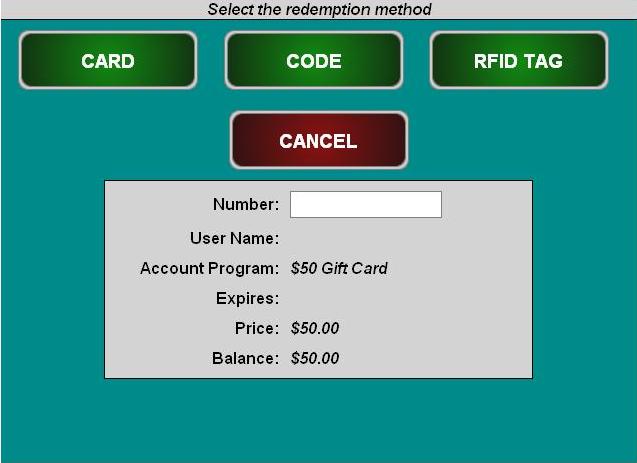
Select code or card.
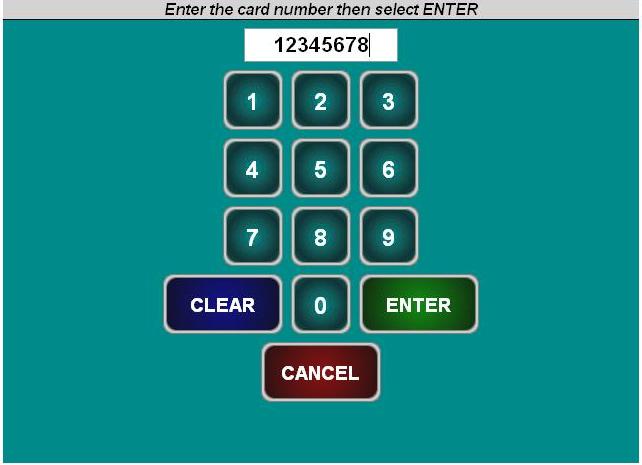
Enter the code or card number.
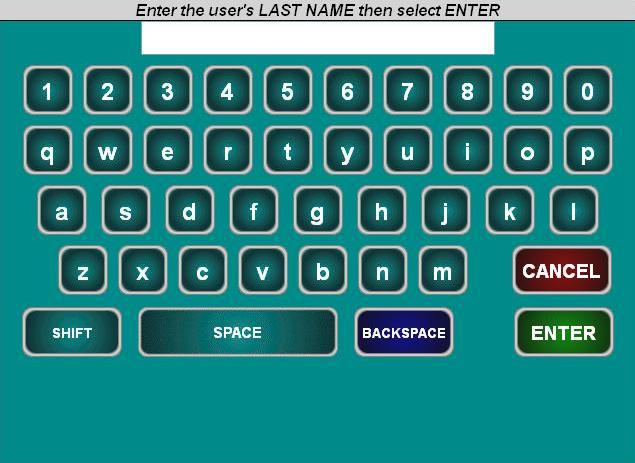
Enter the account holder’s last and first name.
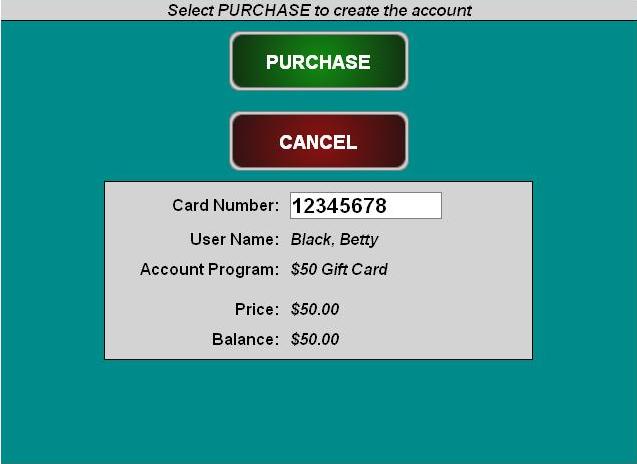
Click Purchase to finalize the account purchase.
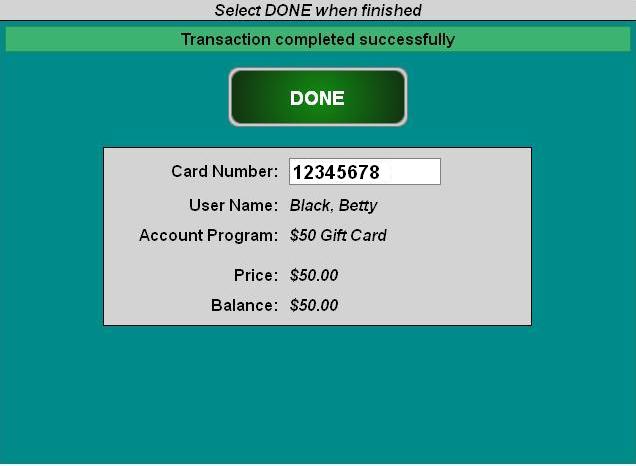
Click Done.